Unlock Superior Flavor: Why Home-Canned Chickpeas Beat Store-Bought
Imagine opening your pantry to find perfectly tender, subtly seasoned chickpeas, ready to elevate any meal in an instant. This isn't a dream – it's the reality of home-canned chickpeas, a game-changer for anyone who loves wholesome, delicious food without the fuss. While store-bought cans offer convenience, they often fall short on flavor, texture, and ingredient control. Learning
how to pressure can chickpeas at home not only stocks your pantry with a versatile superfood but also empowers you with superior taste and incredible savings. Let's delve into why making this culinary staple yourself is a choice you'll never regret.
The Unbeatable Advantages of Home-Canned Chickpeas
For seasoned home cooks and culinary adventurers alike, the benefits of canning your own garbanzo beans are vast and varied, touching upon everything from your palate to your wallet.
Superior Taste and Texture: A Culinary Revelation
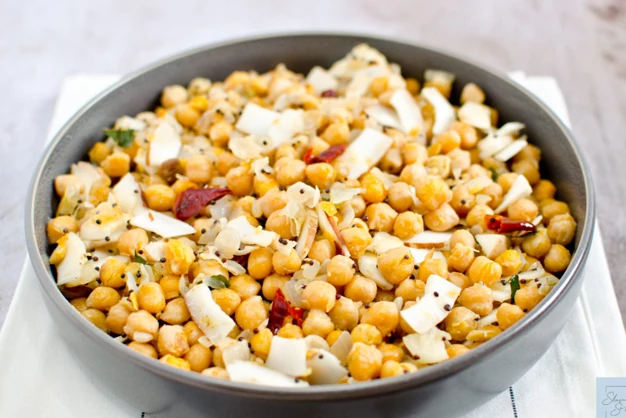
One of the most immediate and striking differences between home-canned and store-bought chickpeas is the profound improvement in taste and texture. Commercial chickpeas, often processed at high temperatures and sitting on shelves for extended periods, can sometimes develop a metallic aftertaste or become overly soft and mushy.
*
Freshness You Can Taste: When you can chickpeas at home, you control the entire process from start to finish. You begin with high-quality dried beans, ensuring a fresher starting point. The gentle, controlled environment of a pressure canner helps maintain their natural flavor, resulting in a cleaner, earthier taste that store-bought varieties simply can't match.
*
Perfectly Tender, Never Mushy: Home-canned chickpeas emerge with a delightful firm-yet-creamy texture that's ideal for a wide range of dishes. They hold their shape beautifully in salads, offer a satisfying bite in stews, and blend into the smoothest, most luxurious hummus you've ever tasted. You’ll be surprised at how much difference this makes in your recipes.
*
Seasoned to Perfection (or Not): Another fantastic perk is the ability to season your chickpeas exactly how you like them. A pinch of canning salt can enhance their natural flavor without overdoing it. Or, you can leave them plain, providing a flexible base for any recipe – whether you're aiming for a spicy curry or a delicate Mediterranean salad. This level of customization is simply not available with pre-packaged options.
Complete Control Over Ingredients: Your Pantry, Your Rules
In an age where understanding what goes into our food is more important than ever, home canning puts you firmly in the driver's seat.
*
No Unwanted Additives: Store-bought canned goods often contain added salt, preservatives, or even undisclosed flavor enhancers. When you can at home, you decide every single ingredient. This means saying goodbye to unnecessary sodium, chemicals, or anything else you don't want in your diet.
*
Tailored to Dietary Needs: For those managing specific dietary requirements, like low-sodium diets or avoiding certain allergens, home canning is a lifesaver. You can ensure your chickpeas are organic, salt-free, or prepared in any way that supports your health goals. It’s peace of mind in every jar.
*
Transparency and Trust: There's an undeniable satisfaction in knowing exactly where your food comes from and how it was prepared. This transparency fosters a greater connection to your food and ensures you're feeding yourself and your family the purest ingredients possible.
Significant Cost Savings and Pantry Power
Beyond taste and control, the financial and practical benefits of learning
how to can chickpeas are compelling.
*
Economical Choice: Dried chickpeas are dramatically cheaper per pound than their canned counterparts. By purchasing dried beans in bulk, you can slash your grocery bill significantly over time. Canning them yourself transforms these inexpensive legumes into ready-to-use meal components that are far more cost-effective than repeatedly buying single cans.
*
Strategic Meal Prep: Canning chickpeas allows you to engage in serious meal planning and preparation for months in advance. Imagine having dozens of jars of cooked chickpeas ready at a moment's notice – no last-minute trips to the store, no frantic soaking and cooking when you're short on time. This proactive approach saves not just money but also invaluable time and mental energy during busy weekdays.
*
Emergency Preparedness: A well-stocked pantry of home-canned goods also contributes to household resilience. In unexpected situations, having shelves lined with nutritious, ready-to-eat staples like chickpeas ensures you and your family have access to wholesome food.
Unmatched Convenience: Meals on Demand
The primary appeal of store-bought canned goods is convenience. However, home-canned chickpeas offer that same grab-and-go ease, but with all the added benefits we've discussed.
*
Instant Wholesomeness: Forget the 12-24 hour soak and subsequent hour-plus cooking time for dried chickpeas. With a jar of home-canned chickpeas, your meal is literally minutes away. Simply open the lid, drain (or not, depending on your recipe), and add them to your dish.
*
Versatility in a Jar: Whether you're whipping up a quick chickpea salad sandwich, simmering a hearty soup, blending a creamy batch of hummus, or adding protein to a vibrant grain bowl, home-canned chickpeas streamline the process. They become your secret weapon for healthy, fast, and delicious meals, even on your busiest days.
Mastering the Art of Canning Chickpeas at Home
While the idea of canning might seem daunting to a novice, the process for
how to can chickpeas using a pressure canner is surprisingly straightforward and incredibly rewarding. It involves just a few key steps and the right equipment.
Essential Ingredients and Tools for Success
Before you begin, gather your essentials. Having everything on hand makes the process smooth and enjoyable.
*
Ingredients:
*
Dried Chickpeas (Garbanzo Beans): The star of the show. Choose high-quality beans for the best results.
*
Water: Plain, cold water for soaking and filling jars.
*
Optional Canning Salt: A small amount can enhance flavor. Use non-iodized salt, as iodine can discolor beans.
*
Core Tools (Non-Negotiable):
*
Pressure Canner with Rack: Absolutely essential for safely canning low-acid foods like chickpeas. A boiling water bath canner is NOT safe for this process.
*
Glass Canning Jars with Lids and Bands: Pint-sized jars are recommended for single servings or small family meals. Ensure jars are clean and free of chips or cracks. Use new lids for each batch to ensure a proper seal.
*
Large Pot or Bowl: For soaking the chickpeas.
*
Ladle or Large Spoon: For filling jars.
*
Clean Kitchen Cloth and White Vinegar: Critical for wiping jar rims before sealing, ensuring a perfect, airtight seal. Even a minimal speck of food can prevent a seal.
*
Helpful Optional Tools (Simplify the Process):
*
Canning Funnel: Keeps jar rims clean during filling.
*
Jar Lifter/Canning Tongs: Safely lifts hot jars out of the canner.
*
Bubble Remover/Headspace Tool: Essential for removing air bubbles and measuring correct headspace. A clean knife can also work.
*
Magnetic Lid Wand: Easily retrieves hot lids from simmering water.
*
Jar Wrench: Helps tighten bands more securely (be careful not to overtighten before processing).
*
Labels: Clearly mark jars with contents and date for easy pantry management.
Step-by-Step Overview of the Canning Process
The journey from dried bean to ready-to-use canned chickpea is simple and systematic.
1.
The Soak: Place your dried chickpeas in a large bowl and cover them with ample cold water – at least 2-3 inches above the beans, as they will double or even triple in size. Let them soak for 12-24 hours. This rehydration is crucial for even cooking and proper processing. After soaking, drain the water, sort through the chickpeas to discard any bad ones, and rinse them thoroughly under running water.
2.
Jar Preparation: While the chickpeas are soaking or cooking, clean your canning jars thoroughly. Keep them hot (in a warm oven, dishwasher, or hot water bath) to prevent thermal shock when filling with hot chickpeas and liquid.
3.
Filling the Jars: You'll typically use a hot pack method for chickpeas. This means heating the soaked and drained chickpeas (simmer them in fresh water for about 30 minutes) before packing them into hot jars. Fill the jars, leaving appropriate headspace (usually 1 inch), and then cover with the hot cooking liquid or fresh boiling water, maintaining that 1-inch headspace. If using salt, add ½ teaspoon to pint jars or 1 teaspoon to quart jars.
4.
Removing Air Bubbles and Sealing: Use a bubble remover or a clean non-metallic utensil to gently release any trapped air bubbles in the jar. Adjust headspace if necessary. Most importantly, wipe the jar rims meticulously with a clean cloth dipped in white vinegar. This ensures no residue interferes with the seal. Place a clean, new lid on each jar, followed by a band, tightened fingertip-tight.
5.
Pressure Canning: Place the filled jars onto the rack in your pressure canner, ensuring there’s adequate water in the canner as per your model’s instructions. Lock the lid, bring the canner to a boil, and allow steam to vent for the recommended time (usually 10 minutes) to remove all air. Then, place the weighted gauge or close the petcock and bring the canner up to the specified pressure (typically 10-15 PSI, depending on altitude and canner type). Process pint jars for 75 minutes and quart jars for 90 minutes. It's crucial to consult your pressure canner's manual and reliable canning guides (like the NCHFP) for precise instructions and elevation adjustments. This step is where the magic happens, making the chickpeas shelf-stable and delicious. For a more detailed walkthrough, refer to our comprehensive article:
How to Pressure Can Chickpeas: An Easy Guide to Stock Your Pantry.
Creative Culinary Uses for Your Home-Canned Chickpeas
Once your jars of perfectly canned chickpeas are safely stored, the culinary possibilities are endless. These legumes are incredibly versatile and can be the star of countless dishes.
*
Creamy Hummus: The ultimate classic! Home-canned chickpeas make the smoothest, most flavorful hummus imaginable. Just blend with tahini, lemon juice, garlic, and olive oil.
*
Vibrant Salads: Add them to a Mediterranean-inspired salad with cucumbers, tomatoes, feta, and olives, or create a hearty chickpea salad sandwich filling as a delightful alternative to tuna.
*
Hearty Soups and Stews: From a comforting minestrone to a spicy Moroccan tagine, chickpeas add body, protein, and texture to any warming bowl.
*
Delicious Curries: Their ability to absorb flavors makes them perfect for creamy coconut curries or robust tomato-based Indian dishes.
*
Crispy Roasted Snacks: Toss drained chickpeas with olive oil and your favorite spices (paprika, cumin, chili powder) and roast until crispy for a healthy, addictive snack or salad topping.
*
Aquafaba Adventures: Don't discard the canning liquid! This "aquafaba" is an incredible vegan egg substitute, perfect for making meringues, mayonnaise, or even whipped cream.
Is Canning Chickpeas Right For You?
Embracing the art of canning chickpeas at home is more than just a kitchen task; it’s an investment in your health, your wallet, and your culinary creativity. The superior taste, complete ingredient control, significant cost savings, and unparalleled convenience make a compelling case for taking the plunge. If you're looking to stock your pantry with wholesome, ready-to-use ingredients that empower you to create delicious meals in minutes, then learning
how to can chickpeas is undoubtedly for you. Ready to transform your pantry and elevate your cooking? Dive into the rewarding world of home canning today! For more detailed steps on maximizing your savings and time, check out our guide:
Save Money & Time: Easy Steps to Canning Chickpeas at Home.